[CentOS7] Oracle 11g 설치
| 목차
1. Oracle 홈페이지 접속 및 설치 파일 다운로드
1.1 Oracle 홈페이지 접속 및 설치 파일 다운로드
1.2 오라클 계정 로그인
2. 의존라이브러리 설치
3. Oracle 계정 생성
3.1 유저 생성 및 권한 설정
3.2 환경변수 편집
4. 오라클 설치 파일 업로드 (파일질라등 이용)
5. 오라클 설치
6. 방화벽 해제(필요시)
7. 오라클 접속 테스트
8. 에러
| 내용
1. Oracle 홈페이지 접속 및 설치 파일 다운로드
1.1 Oracle 홈페이지 접속 및 설치 파일 다운로드
https://www.oracle.com/database/technologies/xe-prior-release-downloads.html 접속
Oracle Database 11gR2 Express Edition for Linux x64 Download
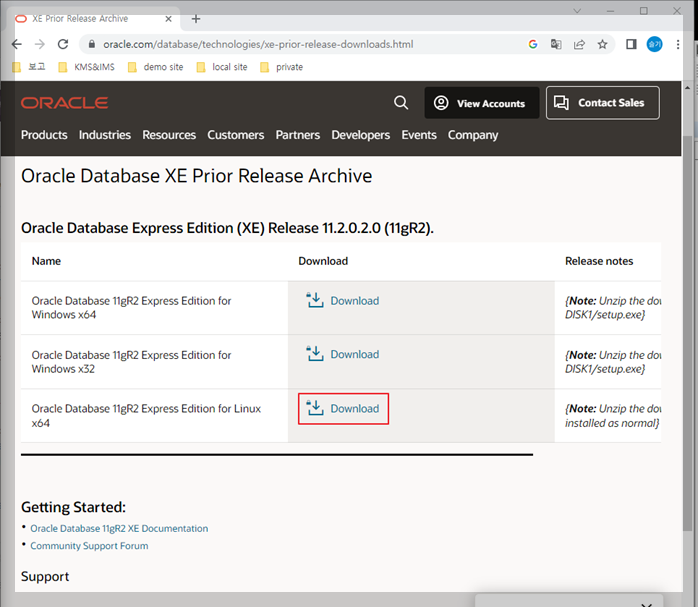
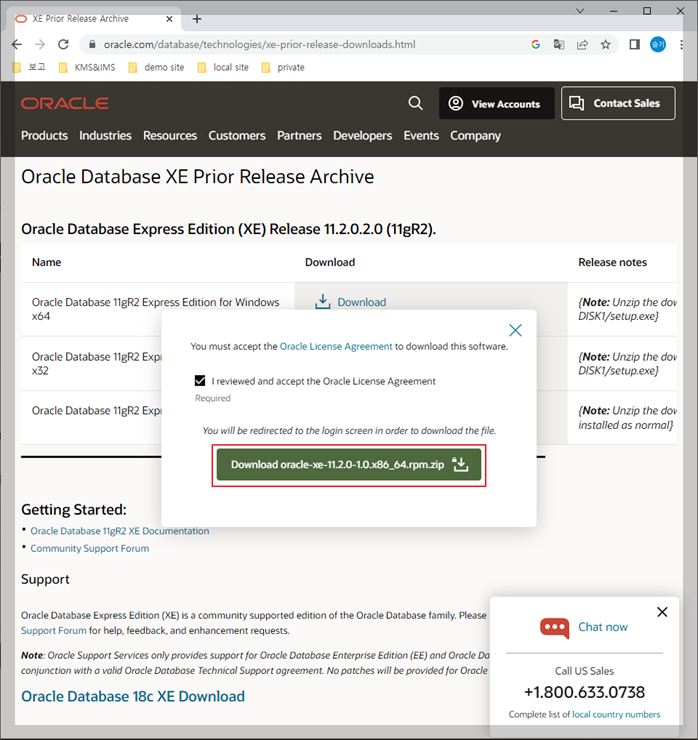
1.2 오라클 계정 로그인

2. 의존라이브러리 설치
yum -y install compat-libstdc++-33.x86_64 binutils elfutils-libelf elfutils-libelf-devel
yum -y install glibc glibc-common glibc-devel glibc-headers gcc gcc-c++ libaio-devel
yum -y install libaio libgcc libstdc++ libstdc++ make sysstat unixODBC unixODBC-devel
yum -y install unzip
yum -y install compat-libstdc++-33.x86_64 binutils elfutils-libelf elfutils-libelf-devel
yum install binutils compat-libcap1 compat-libstdc++-33 gcc gcc-c++ glibc glibc-devel ksh libgcc libstdc++ libstdc++-devel libaio libaio-devel make sysstat
-> y 입력
이미 설치 되어있어서 Nothing to do 일어나면 패스.
3. Oracle 계정 생성
3.1 유저 생성 및 권한 설정
[root@localhost ~]# groupadd dba
[root@localhost ~]# useradd -g dba oracle
[root@localhost ~]# passwd oracle
[root@localhost ~]# mkdir -p /u01/app/oracle
[root@localhost ~]# chown -R oracle:dba /u01
[root@localhost ~]# chmod -R 775 /u01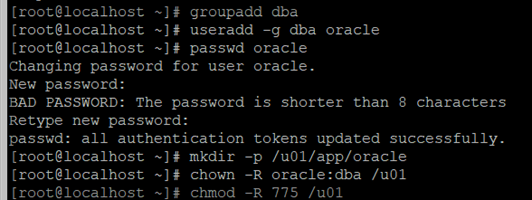
3.2 환경변수 편집
[root@localhost ~]# su - oracle

[oracle@localhost ~]$ vi .bash_profile
export ORACLE_BASE=/u01/app/oracle
export ORACLE_HOME=$ORACLE_BASE/product/11.2.0/xe
export ORACLE_SID=XE
export PATH=$PATH:$ORACLE_HOME/bin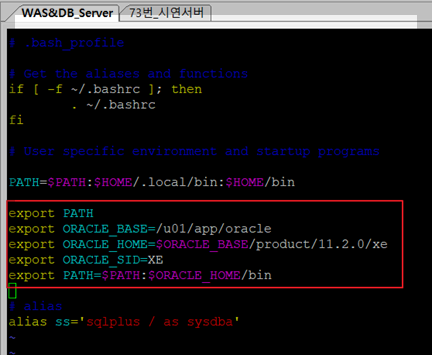
4. 오라클 설치 파일 업로드 (파일질라등 이용)
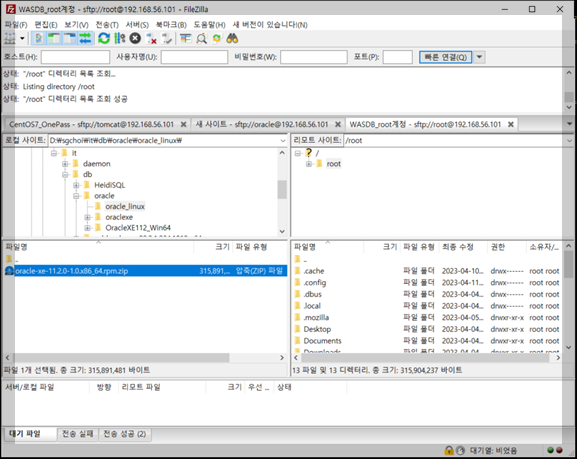
5. 오라클 설치
[root@localhost ~] # unzip oracle-xe-11.2.0-1.0.x86_64.rpm.zip
[root@localhost ~] # cd Disk1/
[root@localhost Disk1]# rpm -Uvh oracle-xe-11.2.0-1.0.x86_64.rpmrpm명령어시 아래와 같은 에러가 뜨면 아래 에러해결을 참고한다.
error: %pre(oracle-xe-11.2.0-1.0.x86_64) scriptlet failed, exit status 1
error: oracle-xe-11.2.0-1.0.x86_64: install failed

[root@localhost Disk1]# cd /etc/init.d/
[root@localhost init.d]# ./oracle-xe configure # passwords는 지정하고 싶은 password 입력하면 된다.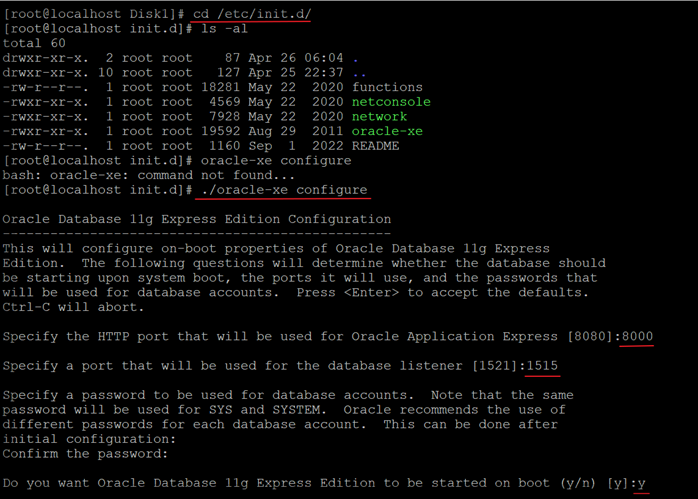
[root@localhost init.d]# cd /u01/app/oracle/product/11.2.0/xe/network/admin/
[root@localhost admin]# vi listener.ora  # ORACLE_HOME과 PORT번호, SID 등 확인
[root@localhost admin]# vi tnsnames.ora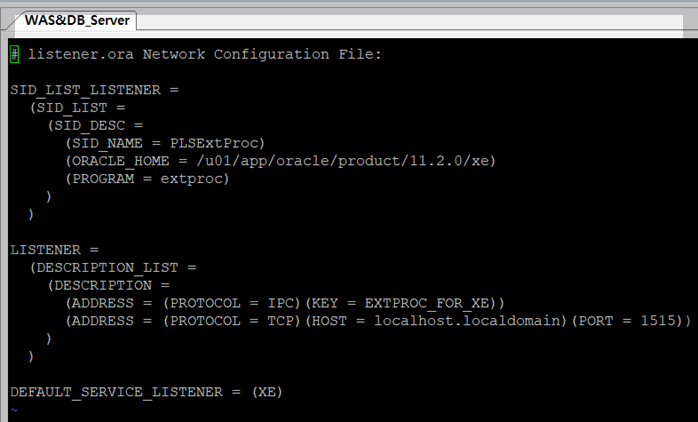
[root@localhost admin]# /etc/init.d/oracle-xe start

Starting oracle-xe (via systemctl):                        [  OK  ]
6. 방화벽 해제(필요시)
[root@localhost admin]# firewall-cmd --permanent --add-port=1515/tcp
success
[root@localhost admin]# firewall-cmd --reload
success
7. 오라클 접속 테스트
[root@localhost admin]# su – oracle
[oracle@localhost ~]$ sqlplus "/as sysdba"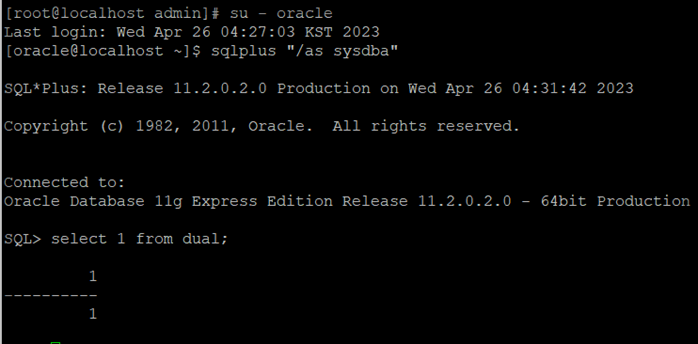
8. 에러
Preparing... ################################# [100%]
This system does not meet the minimum requirements for swap space. Based on
the amount of physical memory available on the system, Oracle Database 11g
Express Edition requires 2048 MB of swap space. This system has 1326 MB
of swap space. Configure more swap space on the system and retry the
installation.
error: %pre(oracle-xe-11.2.0-1.0.x86_64) scriptlet failed, exit status 1
error: oracle-xe-11.2.0-1.0.x86_64: install failed
- 에러 해결
[root@localhost Disk1]# dd if=/dev/zero of=/swapfile bs=1024 count=4194304
4194304+0 records in
4194304+0 records out
4294967296 bytes (4.3 GB) copied, 19.0239 s, 226 MB/s
[root@localhost Disk1]# mkswap /swapfile
Setting up swapspace version 1, size = 4194300 KiB
no label, UUID=fdd25921-cbf1-45c4-8846-af8f6e3330c1

[root@localhost Disk1]# swapon /swapfile
swapon: /swapfile: insecure permissions 0644, 0600 suggested.

[root@localhost Disk1]# swapon -s
Filename                                Type            Size    Used    Priority
/dev/dm-1                               partition       2097148 871936  -2
/swapfile                               file    4194300 0       -3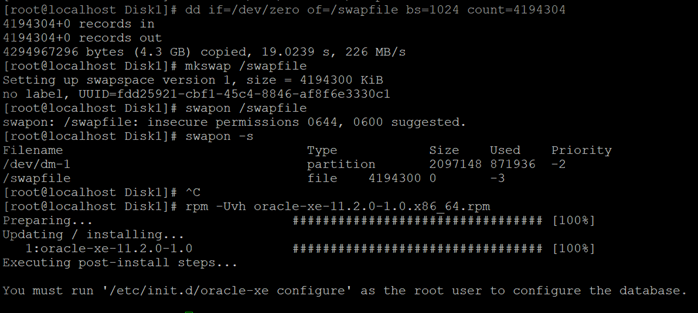
'💻 개발과 자동화' 카테고리의 다른 글
| CentOS7 JEUS8 설치 (jeus 계정) (0) | 2023.08.22 |
|---|---|
| 부팅시 WAS(Tomcat) 자동 재시작 (0) | 2023.08.21 |
| [AWS-Hadoop|Hive|Spark] jupyter 설치 후 pyspark와 연동 (0) | 2022.12.14 |
| [AWS-Hadoop|Hive|Spark] Spark 3.2.3 설치 (0) | 2022.12.13 |
| [AWS-Hadoop|Hive|Spark] Hive 에러 모음 (0) | 2022.12.12 |


댓글