centos7 postgresql13 pgAdmin4 설치 + 외부 접속, 로그 파일 생성
1. Postgres 설치
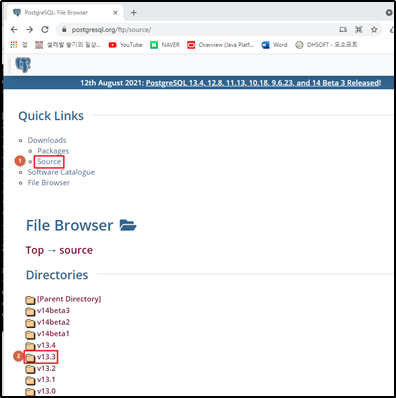
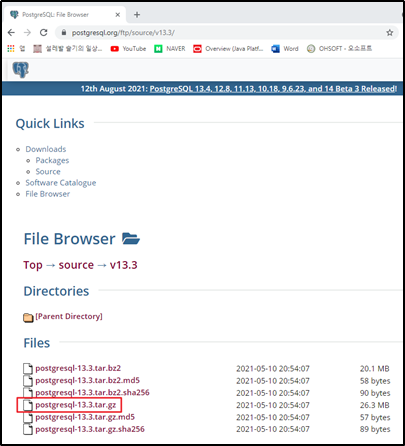
1.1 설치 파일 다운로드 및 업로드
https://www.postgresql.org/ftp/source/

1.2 압축 해제
postgresql 설치는 postgres 계정을 별도로 생성하여 만듬.
[postgres@localhost ~]$ tar -xvf postgresql-13.3.tar.gz

1.3 관련 패키지 다운로드
yum -y install gcc gcc-c++ boost boost-devel pkgconfig uuidd libtool autoconf make coreutils uuid-dev uuid-devel libuuid-devel e2fsprogs-devel readline readline-devel zlib zlib-devel openssl openssl-devel gettext

1.4 Postgres configure 설정 및 설치진행
[postgres@localhost postgresql-13.3]$ ./configure --prefix=/home/postgres/postgres/postgresql-13.3/pgsql
--prefix는 설치 디렉토리 지정
[postgres@localhost postgresql-13.3]$ make
[postgres@localhost postgresql-13.3]$ make install
1.5 DB 설치
[postgres@localhost bin]$ ./initdb -D /home/postgres/postgres/postgresql-13.3/pgsql/data
[postgres@localhost bin]$ pwd
/home/postgres/postgres/postgresql-13.3/pgsql/bin
1.6 POSTGRES 환경 설정
[postgres@localhost ~]$ vi ~/.bash_profile
PATH=$PATH:$HOME/bin:$POSTGRES_HOME/bin
POSTGRES_HOME=/home/postgres/postgres/postgresql-13.3/pgsql
PGLIB=$POSTGRES_HOME/lib
PGDATA=$POSTGRES_HOME/data

[postgres@localhost pgsql]$ source ~/.bash_profile --~/.bash_profile 적용
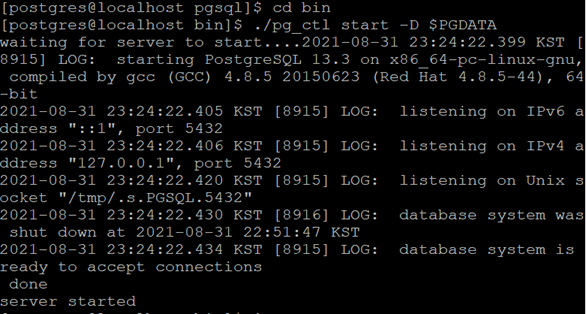
1.7 DB 시작
[postgres@localhost bin]$ ./pg_ctl start -D $PGDATA

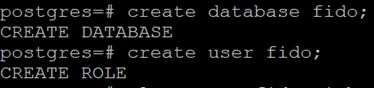
1.7.1 Database / user / schema생성
# database 생성
postgres=# create database fido;
CREATE DATABASE
# user 생성
postgres=# create user fido;
CREATE ROLE
# 비밀번호 설정
postgres=# alter user fido with password 'fido';
ALTER ROLE

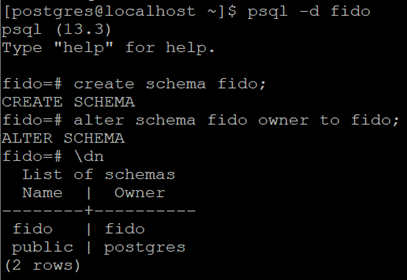
# schema 생성 및 소유자 변경
[postgres@localhost ~]$ psql -d fido –psql 접속
psql (13.3)
Type "help" for help.
fido=# create schema fido; --schema 생성
CREATE SCHEMA
fido=# alter schema fido owner to fido; --스키마 소유자 변경
ALTER SCHEMA
fido=# \dn –해당 db내의 schema 확인
List of schemas
Name | Owner
--------+----------
fido | fido
public | postgres
(2 rows)
2. POSTGRESQL 외부 접속 설정
2.1 외부 접속 허용
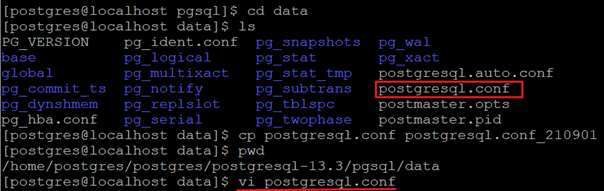
2.1.1 Postgresql.conf 수정
[postgres@localhost data]$ vi postgresql.conf
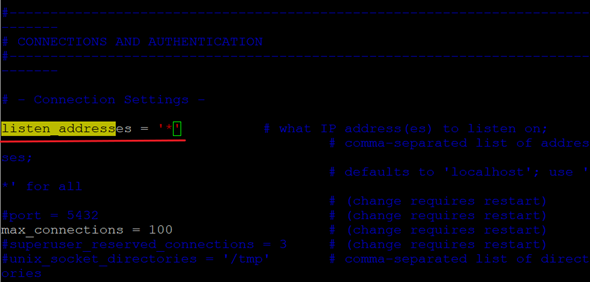
주석 해제 후 ‘localhost’ -> ‘*’ 로 변경
쉽게 찾는 방법: shift + ? listen 검색

listen_addresses = '*'
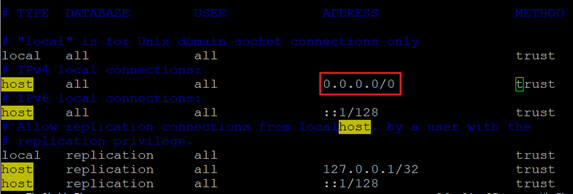
2.1.2. pg_hba.conf
127.0.0.1/32 -> 0.0.0.0/0 으로 변경해 모두 접속 허용
[변경전]
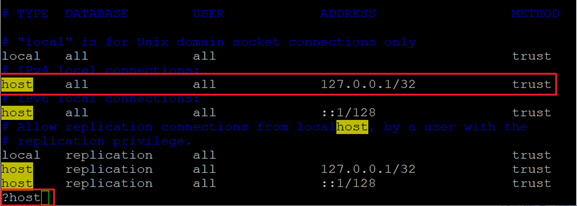
[변경후]
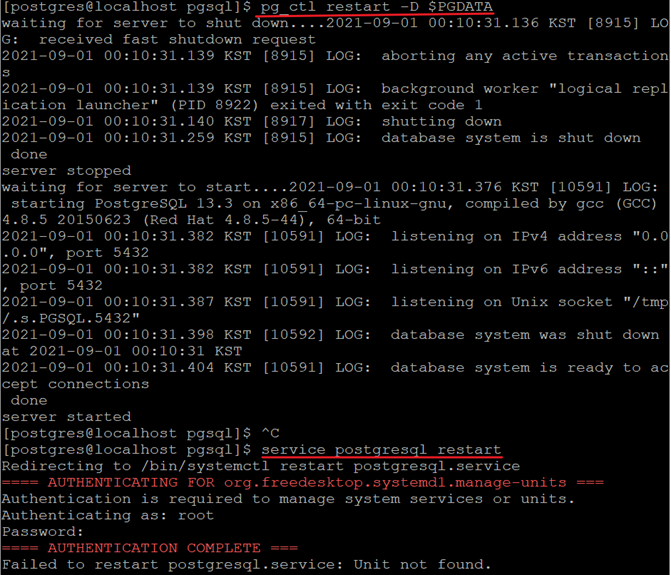
2.2 재시작
[postgres@localhost pgsql]$ pg_ctl restart -D $PGDATA
혹은
[postgres@localhost pgsql]$ service postgresql restart
Redirecting to /bin/systemctl restart postgresql.service
==== AUTHENTICATING FOR org.freedesktop.systemd1.manage-units ===
Authentication is required to manage system services or units.
Authenticating as: root
Password:
==== AUTHENTICATION COMPLETE ===
Failed to restart postgresql.service: Unit not found.
2.3 방화벽 해제(5432)
[root@localhost ~]# firewall-cmd --permanent --zone=public --add-service=postgresql
success
[root@localhost ~]# firewall-cmd --reload
Success

3. POSTGRESQL LOG FILE 생성
3.1 POSTGRES LOG FILE 생성
3.1.1 Postgresql.conf 파일 찾기
먼저 postgres 설정 File에서 log관련 설정들을 수정해줘야 하므로 Postgrdsql.conf 파일 위치를 찾습니다.
show config_file;

3.1.2 Data_directory 위치 찾기
log 폴더가 data_direcotry 밑으로 들어가기 때문에 data_directory 위치도 찾아줍니다.
show data_directory;

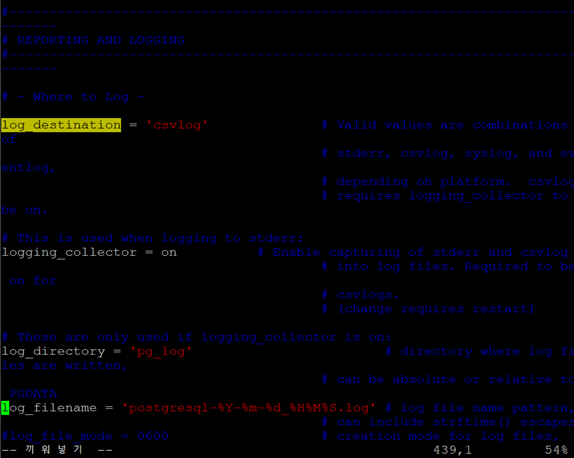
3.2 Postgresql.conf 파일 수정
1번에서 찾았던 postgres conf 파일을 열어 아래와 같이 log 관련 설정들을 수정해줍니다.
[postgres@localhost postgresql-13.3]$ vi /home/postgres/postgres/postgresql-13.3/pgsql/data/postgresql.conf
아래 4가지 설정 주석 해제
log_destination = 'csvlog'
logging_collector = on
log_directory = 'pg_log'
log_filename = 'postgresql-%Y-%m-%d_%H%M%S.log'
3.3 Postgresql 재시작
위에서 설정한 사항들이 적용될 수 있도록 postgresql을 재시작 해줍니다.
[postgres@localhost bin]$ ./pg_ctl restart -D $PGDATA

위의 방법으로 postgres 재시작이 안되면 아래와 같은 방법으로 재시작
[postgres@localhost bin]$ service postgresql restart
3.4 LOG 파일 생성 확인
마지막으로 LOG 파일이 잘 생성되었는지 확인합니다.
위에 postgres conf 파일에서 설정한 4가지 기억하시죠? 그거에 맞춰 설정한 위치에 log 파일이 생깁니다.
즉 LOG 위치 & FILE명 형식 : data_direcotry/log_directory/log_filename

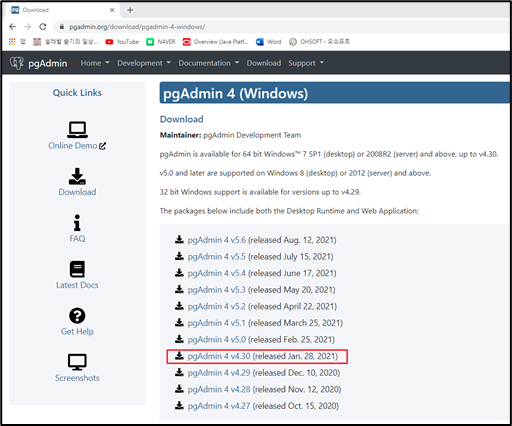
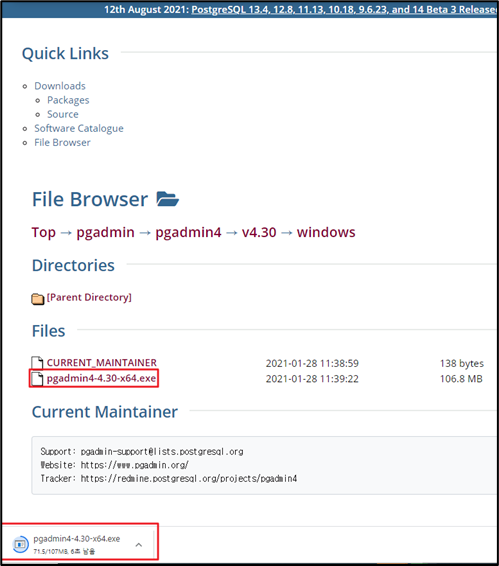
4. PgAdmin4 다운
4.1 PGADMIN4 다운


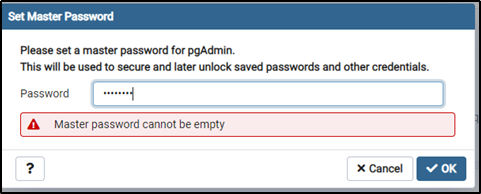
5. pgAdmin4 실행
5.1 pgAdmin4 실행
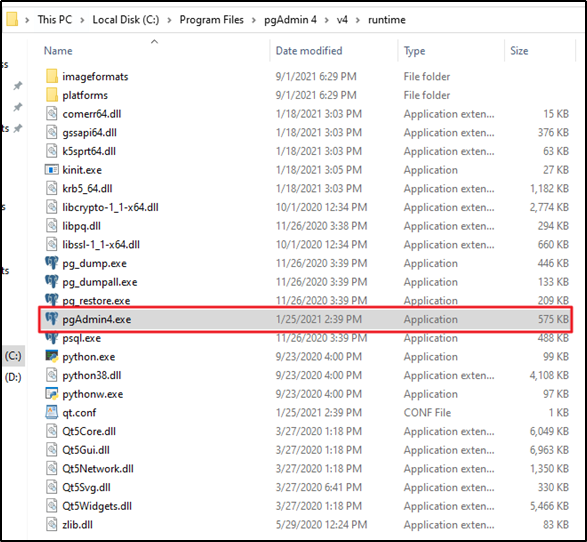
위치 : pgAdmin4.exe는 설치한 pgAdmin 4\v4\runtime에 위치되어있음.
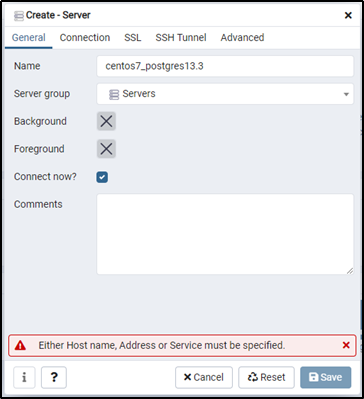
5.2 접속 테스트 및 접속 완료

5.3 쿼리 작성
